
Inspiration and advice
Wall slats, fitting them step by step. A DIY guide
How to fit wall slats: a step-by-step guide covering wall preparation, adhesive and finishing trims. Fitting slatted panels yourself, the DIY way.

Introduction
Want to fit wall slats yourself but do not know where to start? This guide takes you step by step through the whole process, from preparing the wall through choosing the construction adhesive to finishing with trims. You will also find out how Strama Panels decorative slats differ from traditional battens and why fitting them is quicker than you think.
Contents
What Strama Panels slatted panels are, an important difference
Before you start fitting slats, it is worth checking which product you are dealing with. There are two completely different slat systems on the market, and each is fitted in a different way.
Traditional slats: separate narrow battens
Most products in builders' merchants and from the popular manufacturers are separate narrow battens, 20 to 45 mm wide, bonded or screwed one beside the other straight onto the wall, each one individually and at even spacings. The work is precise but laborious: on a 3 m² wall you may be bonding 60 to 80 battens.
Strama Panels slat panels: a wide panel with a profiled surface
Strama Panels slats are something else entirely. They are a wide panel measuring 600 × 2400 / 2500 / 2800 mm with the slats already fitted. One panel covers 0.6 m of wall at once, so instead of dozens of battens you are fixing a handful of panels.
The key advantage of the Strama system: the slat panel has the same dimensions as every other Interior Design wall panel (600 mm wide, 2400 to 2800 mm high, 24 mm thick). You can combine a slat panel with a classic or upholstered panel on the same wall, since they all join with the same tongue-and-groove system and take the same finishing trims. It is a unique property that no other slat manufacturer on the market offers.
The visual effect is identical to traditional slats, with a vertical rhythm, depth and a play of shadow, but fitting is many times quicker.
Before you start, choosing slats, tools and materials
Good preparation is half the battle. Before you start fitting wall slats, check the options available and gather the tools you need.
Choosing slats: finish and format
Strama slat panels come in several variants. Your choice should take account of the style of the interior and of which other wall panels you plan to combine them with. Slats are available in wood-effect finishes (Grandson Oak, Walnut Lagoda) and in solid colours (Black 3D, White). The length of the slats depends on the height of the room; the standard formats are 2400, 2500 and 2800 mm.
Tool list
- A spirit level (at least 60 cm) or a cross-line laser
- A pencil to mark panel positions on the wall
- A tape measure
- A fine-toothed saw or jigsaw for cutting furniture board
- A frame: timber battens or plasterboard profiles
Preparing the wall before fitting slats
What about wallpaper and old paint?
One advantage of the STRAMA PANELS wall panel system is that wallpaper and paint do not have to be removed. What matters is that the wall is sound enough to take the frame.
Fitting wall slats, step by step
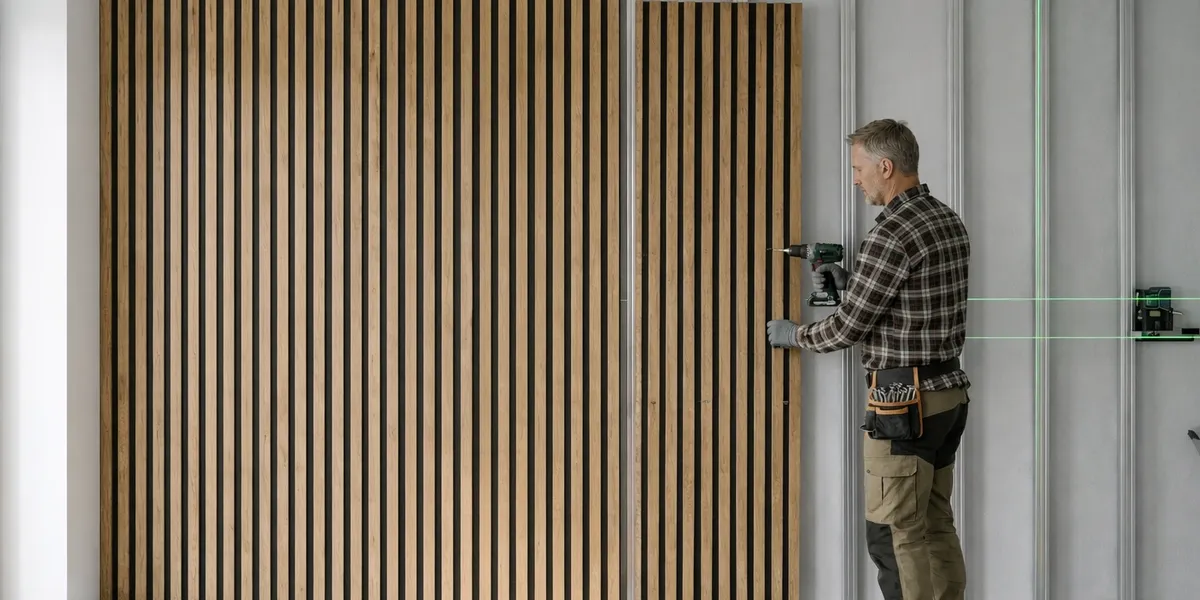
Fitting Strama Panels slats is wall panel fitting in the standard Interior Design system.
Step 1: planning the layout and marking positions
Before fitting slats, plan the panel layout on the wall. Measure the width of the wall and divide it by 600 mm (the panel width), then check whether the last panel fits whole or will need cutting. For the best result we recommend a symmetrical layout.
Use a spirit level to make sure the first line is exactly plumb, as the whole arrangement of the following panels depends on it. Mark the positions of the following panels too, allowing for where the finishing trims go at floor and ceiling.
Step 2: cutting panels to size
If the room is lower than the slat length, trim the panel at the bottom or the top. Cut with a fine-toothed saw to avoid fraying the laminate. The slat surface can be sanded lightly after cutting. At the ceiling, the slats should be 5 to 10 mm shorter than the wall height
Step 3: fitting the following panels and spacing
Slide each following panel's tongue into the groove of the previous one and press it to the wall. Thanks to the tongue-and-groove system you need no spacers and no tape measure to keep the spacing even: the panel settles into the correct position by itself. Check plumb with the spirit level after every panel.
Fitting slats on a ceiling, what changes
Planning to fit slats on a ceiling, or over a full wall height and the ceiling at once? Several things work differently here than on a wall.
Fitting slats on a ceiling: a frame is compulsory
Slats are not fitted to a ceiling with adhesive alone, as gravity and the weight of the panel call for mechanical fixing. For ceiling work you would use a plasterboard frame screwed to the ceiling structure, on which the panel rests and to which it is screwed. Strama Panels wall and ceiling slats have the same dimensions.
Wall and ceiling in the same panel
One of the loveliest schemes with slats is finishing the wall and the ceiling in the same panel: the optical effect makes the space feel larger and gives the interior a coherent, architectural character. Slats running the full height of the wall and flowing onto the ceiling need the corner to be planned precisely. The simplest way is to use a corner trim, or to cut the panels at 45°.
Fitting slats on timber battens or a steel frame
We recommend using a subframe, either timber or the steel plasterboard type.
When is a subframe essential?
- A crooked or uneven wall: deviations of more than 5 to 10 mm from plumb cannot be taken up with adhesive
- A damp wall: a cellar, a garage, an uninsulated external wall; a subframe with an air gap protects the panel from moisture
- A wall in engineering brick or stone: a hard, uneven substrate that is hard to bond to
- Electrical services to conceal: the space between wall and panel lets cables be run
- Ceiling work: a mechanical structure is always required
Timber subframe: the easy choice for DIY
A timber subframe is the easier answer for anyone doing the work themselves. You use timber battens (usually 45 × 45 mm or 50 × 60 mm) screwed to the wall with expanding plugs, horizontally or vertically, at 60 cm centres. The battens must be dry.
You set the batten spacing to the panel width: a 600 mm panel needs fixing points every 600 mm.
Steel frame: precision and durability, as with plasterboard
A steel frame in CD and UD profiles (identical to plasterboard construction) gives the highest precision and durability. UD profile goes at floor and ceiling, and vertical CD profiles at 60 cm centres fill the space between. The frame is levelled with adjustable hangers, and can take up even very crooked walls with no filling.
A slat panel is fixed to a steel frame with sharp-point screws every 300 mm. The screw should enter the profile by at least 10 mm.
Comparison of fitting methods
| Method | When to use it | DIY difficulty | Fitting time |
|---|---|---|---|
| Adhesive | A level, dry, plastered wall | ✅ Easy | Shortest |
| Timber subframe | A crooked wall, services to conceal | ✅ Moderate | Longer, by the time the battens take |
| Steel CD/UD frame | A very crooked wall, a ceiling, services to conceal, partitions | ⚠️ Needs practice | Longest, most accurate |
Important with any subframe: whatever the material, timber or steel, make sure the fixing surface (the batten or the CD profile) is exactly plumb or level. An error at the frame stage carries through to every panel. Check every batten separately with a spirit level or laser before you screw the panels on.
Frequently asked questions, fitting wall slats
How do I fit wall slats myself, without a crew?
Fitting Strama Panels slats yourself is far easier than traditional battens: you are bonding one wide panel instead of dozens of narrow battens. You need a spirit level, an adhesive gun and a saw. Doing one wall (around 3 m²) yourself usually takes 2 to 3 hours the first time. Step-by-step instructions come with every order.
Can slats be bonded straight onto a plasterboard wall?
We recommend mechanical fixing with suitable screws. The main advantage of that method is that the panels can be taken down and refitted later.
How do I keep the spacing even with traditional slats?
With traditional narrow battens you use timber spacers, offcuts of board as thick as the intended gap. You place a spacer between the battens while bonding and remove it once the adhesive has set. With Strama Panels slats the problem does not arise: the tongue-and-groove system sets the correct spacing between panels automatically.
Are ceiling slats fitted with adhesive or mechanically?
On a ceiling, slats are not fitted with construction adhesive alone, as gravity is not on the fitter's side. Fitting slats to a ceiling calls for a frame screwed to the structure or the rafters, to which the panel is fixed mechanically. Strama wall slats have the same dimensions as the ceiling panels, so one format covers both surfaces.
Can Strama slat panels be combined with other wall panels?
Yes, and that is the greatest advantage of the Strama Panels system. Slat panels have identical dimensions (600 mm wide) and the same tongue-and-groove joint as every other Interior Design wall panel. On one wall you can combine a slat panel with a smooth, concrete or textile one, and they all take the same finishing trims. No other slat manufacturer offers that compatibility.
In summary, fitting slats yourself is simpler than you think
Fitting Strama Panels wall slats is easier than fitting traditional battens: one wide panel covers 0.6 m of wall, the tongue-and-groove system removes the need to measure gaps, and compatibility with the other Interior Design panels opens up design possibilities that classic slats cannot reach. You can transform an interior, a living room, a bedroom or a corridor, yourself in a single weekend.
See the finishes available and order samples before fitting: → Strama Panels wall slats: range and finishes


