finishing trims
ceiling, bendable corner, special
Interior Design Wall Panels
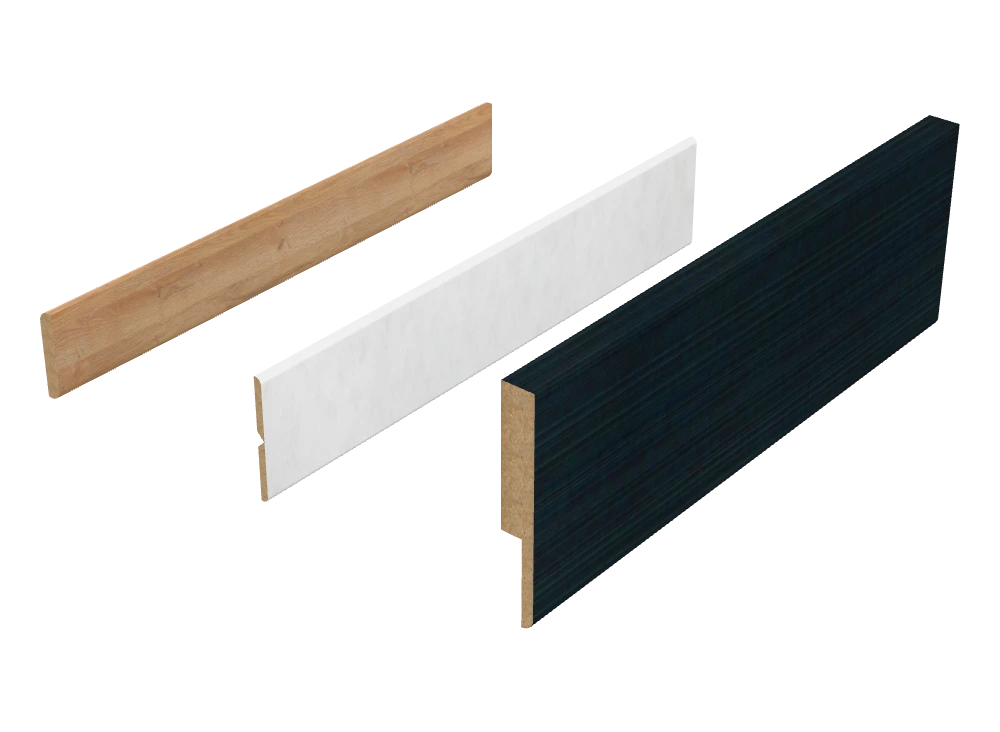
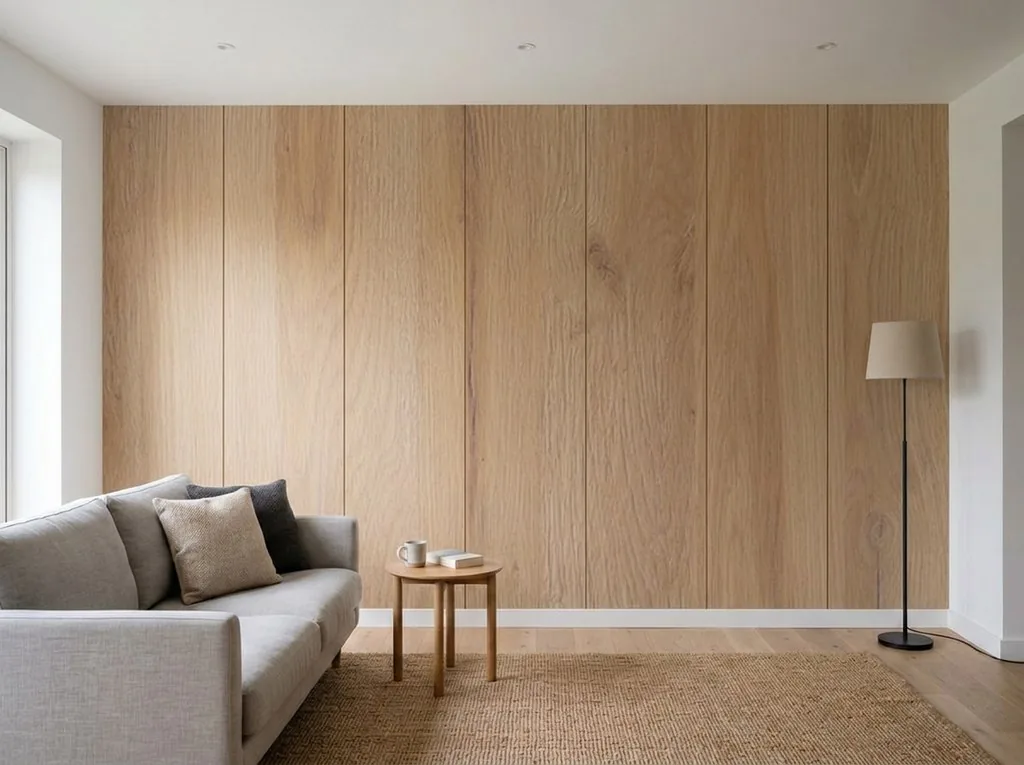
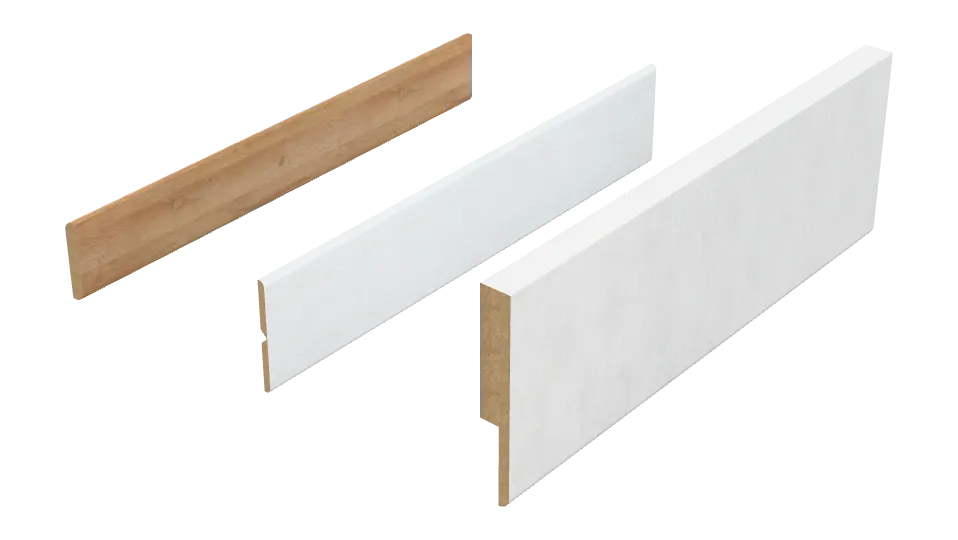
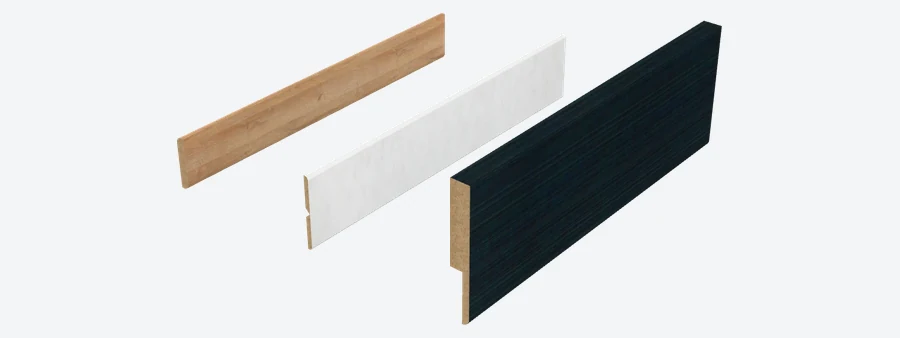
Three trims in the panel finish close the wall: at the ceiling, in the corners and at the floor. The same trims for every wall panel line.
In brief
ceiling, bendable corner, special
cut to size on site
the same foils as the wall panels
standard, fire-retardant, plywood, ultra-light, slats
Which trim goes where
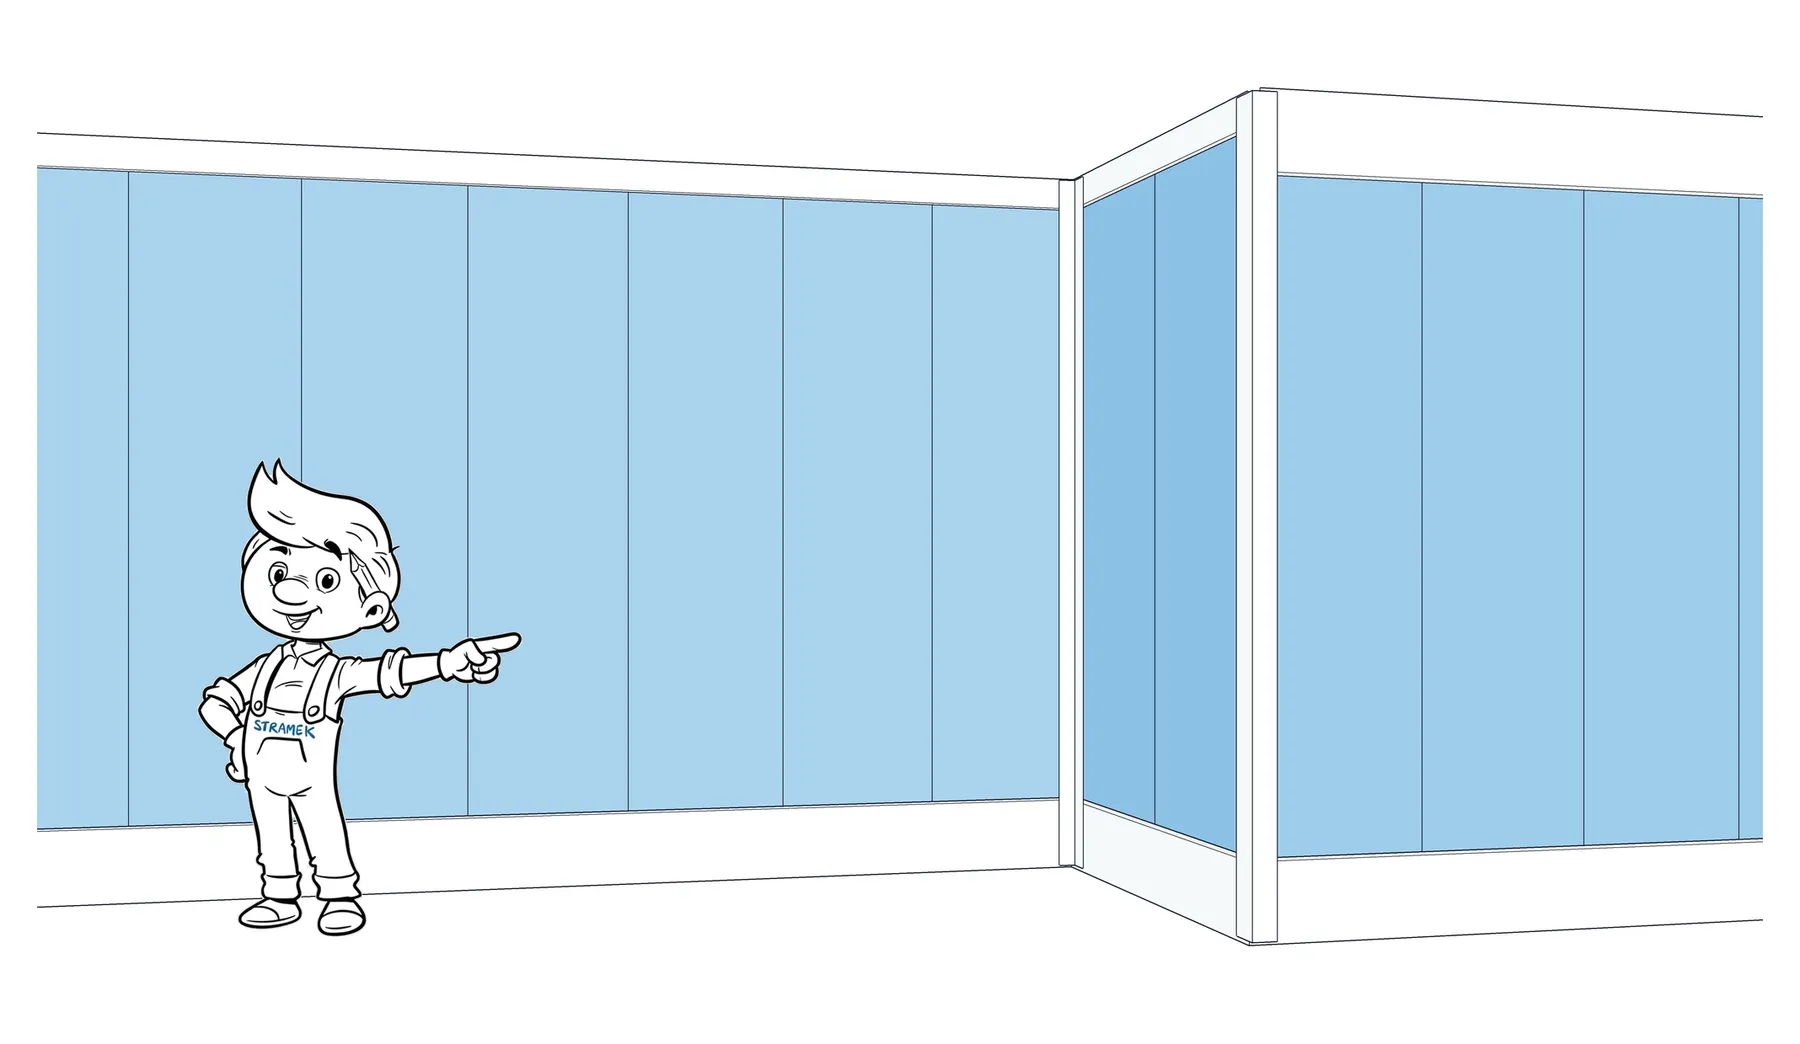
The same three profiles serve the whole Interior Design line: standard panels, fire-retardant panels, plywood, ultra-light panels and slats. Each number marks one installation point. Click a number or a description to highlight that trim on the drawing.
Profiles
Cross-sections traced from the 3D models we make available for download. Dimensions in millimetres.
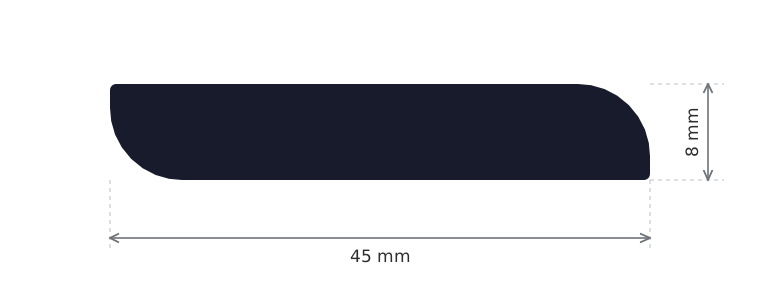
45 × 8 mm. A straight profile with one rounded edge. It closes the joint between panel and ceiling and covers the expansion gap.
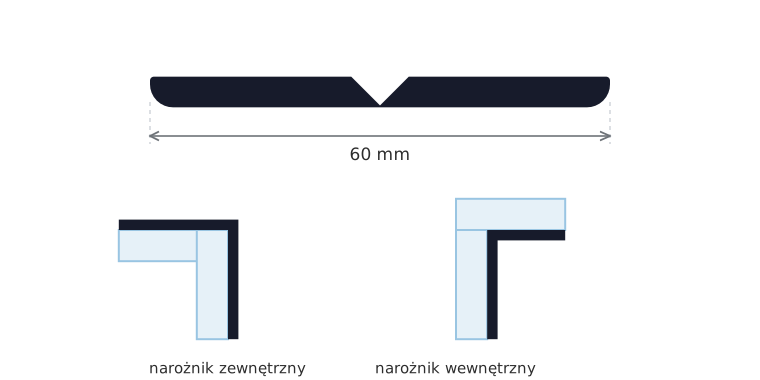
60 × 4 mm. The V-groove in the middle lets you bend the trim on site, in internal and external corners, at right angles and at intermediate angles.
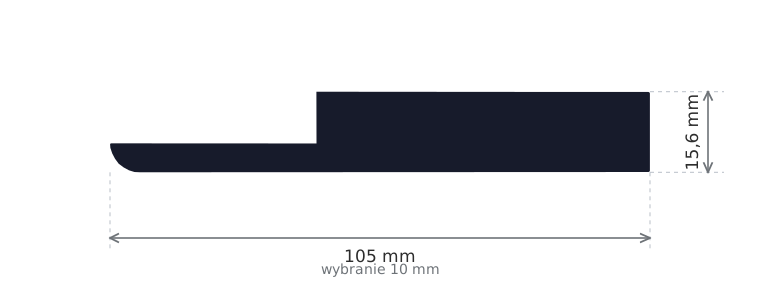
104.6 × 15.6 mm. A stepped profile with a 10 mm rebate that takes the edge of the panel. It works at the floor and at the ceiling.
Newsletter
Visualiser
Upload a photo of your room, pick a finish, and in a few seconds you will see your wall with panels on it. Compare several finishes on the same photo and save the results to your account.

3D model
A model of the trim in the selected finish, which you can rotate. The corner of the window shows the texture close up. Full 1:1 GLB files are in the downloads section.
The model loads once it scrolls into view
Ceiling trim 45 Black 3D V
Finish the same decors as the wall panels
Fitting cross-sections
Cross-sections from installation instruction SP-ID 02.23: the expansion gaps and how the trim is seated at the ceiling, in the corners and at the floor.
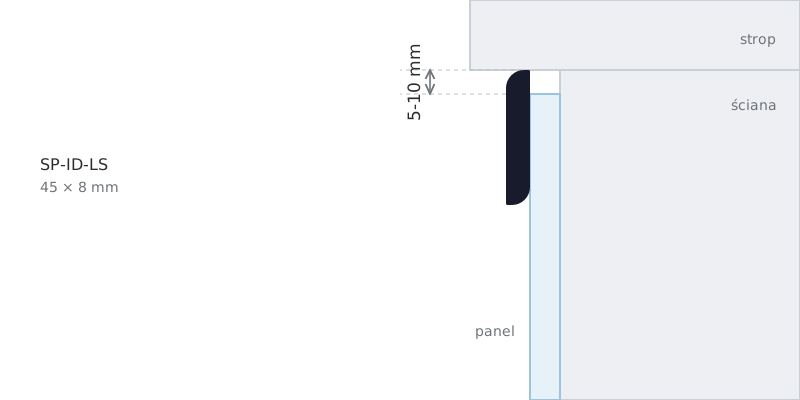
The panel ends 5-10 mm short of the ceiling. The ceiling trim covers the expansion gap.
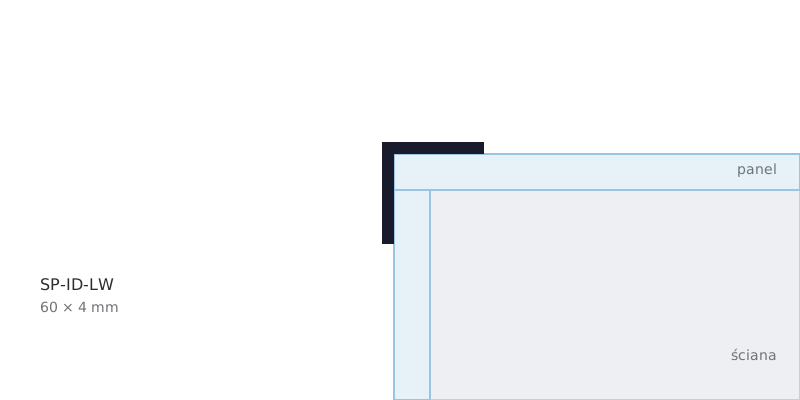
Bent outwards, the trim wraps the panel edges from both walls.
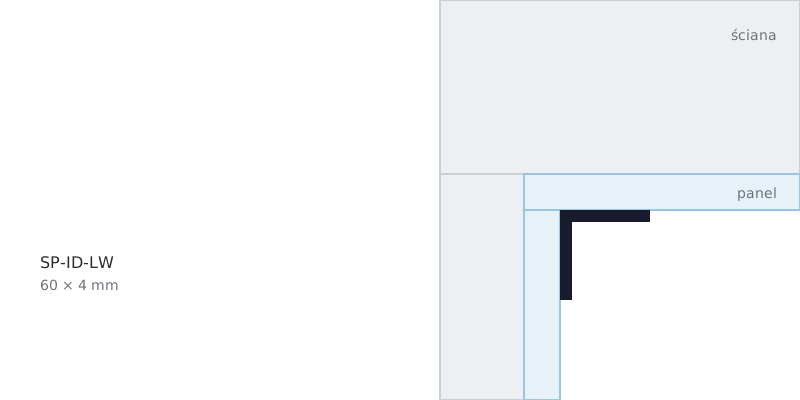
The same trim bent inwards closes the panel joint in the corner.
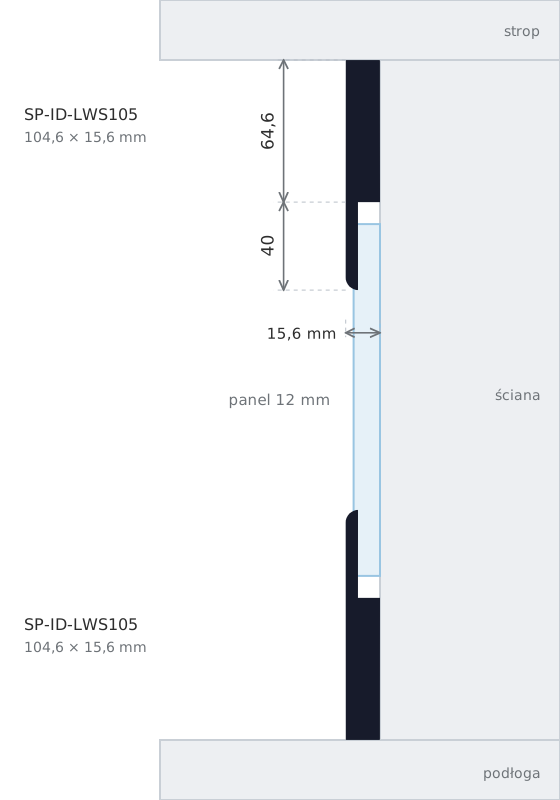
The edge of the panel sits in the rebate of the special trim. The same profile is used at the floor and, mirrored, at the ceiling.
Newsletter
Visualiser
Upload a photo of your room, pick a finish, and in a few seconds you will see your wall with panels on it. Compare several finishes on the same photo and save the results to your account.
Data
From the Interior Design SP-ID data sheet (version 02-2026) and installation instruction SP-ID 02.23.
Finish availability can differ between lengths, please contact us so we can confirm it.
Downloads
Data sheet, installation instruction and trim models in GLB, IFC and DXF.
Before you order
Yes. The same three trims serve standard panels, fire-retardant panels, natural and veneered plywood, ultra-light panels and slats. The panel thickness is the same across the whole line.
The corner trim (60 mm) is bendable: it has a groove along which it is bent on site, and it closes corners as well as horizontal panel joints. The special trim (105 mm) is wider and has a rebate that takes the edge of the panel. It works at the floor and under the ceiling.
Yes, the trims are wrapped in the same foil as the panels. You quote the panel finish when ordering; we confirm the availability of that particular finish before the order.
We recommend a trim adhesive applied to the back of the profile. A circular saw is all you need for cutting.
Yes. The panel ends 5-10 mm short of the ceiling and of the floor, and on a concrete or steel substrate at least 10 mm is left between wall and panel. The trim covers that gap.
STRAMA PANELS
Tell us the panel line and the finish, and we will confirm trim availability and lengths.
Wall panels
 Classic panels
 Fire-retardant panels
 Ultra-light panels
 Natural / veneered plywood
 Upholstered / acoustic panels
 Wall slats
 AccessoriesYou are here